
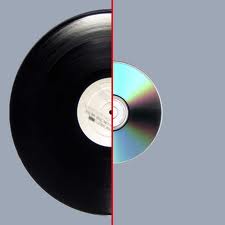
 Vinyl to CD conversion is turning into more and more common recently. however as additional folks convert their vinyl music into a digital format, the old question arises: that is that the best format for your music?
Although there ar staunch fans on either facet of the argument UN agency can ne'er be swayed, this text tries to check the 2 formats and proposes whether or not you must take into account changing your vinyl assortment into a digital format.
Storage : Storage isn't a significant concern for several folks, however CDs can still take up less area within the home, therefore if you do not have abundant area for your music then you'll be able to keep all of your CDs in one corner and keep them out of the approach.
Portability : there's little doubt regarding it: CD are easier to pay attention to on the go than vinyl. If you have got an oversize assortment of vinyl then it's hardly attainable to pay attention thereto in your automotive, at work or within the park. CDs don't seem to be solely additional moveable, however you'll be able to even convert them into MP3 format to require even additional of your tunes with you where you go. therefore though you're an acquaintance of vinyl, vinyl to CD conversion may be for this one reason alone.
 Sound Quality : this is often wherever the massive argument is for several. Some folks would ne'er take into account vinyl to CD conversion as a result of they take into account analogue to be way superior to digital. It's true that vinyl features a larger vary of frequencies that CDs, however others would argue that you just cannot hear these variations. several can tell you that vinyl features a fuller sound that creates taking note of them additional pleasant, however fashionable CD players ar creating CDs sound additional like vinyl all the time.
Durability :This is another issue wherever CDs win handily. similarly because the indisputable fact that a physical CD is harder, you'll be able to copy a CD as over and over as you would like and also the quality can stay an equivalent, which means you'll be able to back it up and ne'er lose your precious music. With vinyl, if you scratch or break your albums then you lose the music. for several this is often a decent reason to contemplate vinyl to CD conversion if solely to backup their music assortment.
As a follower of vinyl, nobody can persuade Pine Tree State that there's something that sounds higher. Vinyl was custom created for the human ear. I live for the sound, i really like the atmosphere a record album exudes: the jacket, the art, and yes, even the hisses, crackles and pops -- to Pine Tree State, all ar a section of the music.
 Even the hum or drone of associate previous electronic equipment, this is often however the music was created, so yes, it'll sound this fashion. however CDs do provide the choice of movableness (you can’t play vinyl in your car) in order that they do provide one thing.
Jay Self, of Hudson, Illinois, has beloved vinyl records as long as he will bear in mind. He shared with Pine Tree State one thing that stood call at his mind regarding a piece of writing he saw a couple of gentleman UN agency closely-held a record store in Wisconsin. "He aforesaid that a CD was like walking into a space with a high-watt, clean lightweight bulb illuminating each nook and cranny within the area. associate phonograph recording was like walking into an equivalent area, however with soft lighting fixture that bathed you within the heat of its glow."
As additional and additional freelance record stores ar closing their doors across the country, it's as a result of the sales of CDs have plummeted, not as a result of vinyl sales have gone down. On the contrary, it's the sale of vinyl and also the improvement of the record album that's keeping a number of these freelance stores open.
 It is a weird music world we have a tendency to board. There has been and could be a major upheaval within the approach customers discover, purchase and hear music. folks taking note of music on their cell phones and fitting their music collections in their pockets with moveable iPods and MP3 players. digitization, it seems, is that the new distribution method for many with file sharing, ring tones, YouTube, iTunes, MySpace, Satellite radio and downloading is that the solely choice for a few.
In the end, it comes all the way down to personal preference whether or not you like CDs or vinyl. Whereas CDs have several advantages, the sound quality of vinyl isn't one thing that may be replicated in an exceedingly digital format, therefore there ar arguments on each side.
However, maybe the problem isn't regarding selecting one format over the opposite. several vinyl fans convert their music collections onto CD for variety of reasons, and it's currently very easy to try to to that several folks would advocate it though you like listing to vinyls than CDs.
1. Stop all scanners and other software packages – if these are left on they cause distortion to recording and burning.
11. Select the identical equipment to your media player i.e. vhs to vhs, dvd to dvd etc
12. If wanting to listen and watch your preview, make sure audio and video checked
13. If you don't want to sit around waiting for the recording to finish select and check timer(left click and drag mouse over number one, then insert time period
14. Take a moment to check process from 1-12
15. If VHS to VHS setting - Click configuration and set TV format ratio to 4:3(if not already set), If CD to CD – set TV format to 16:9, keep Quality at 73-75%(you can try quality at 100%, I have found that dropped frames occur after approx 45-60 mins of recording, I then had to follow stages 30 to 46 and the quality was sharper. If you have the time to sit and stop the video player each time frames dropped then replay and record then the 100% quality marking is well worth it).
16. Press play button on video player to check VHS tape is at desired place (Picture should appear in 'Preview Screen')
17. Audio bar should show decibel levels in two orange lines which fluctuate in length
18. *Important:See No 1* No audio or picture(sometimes if you connect transfer device before stage 1, magix may not log it and sound/video may not appear). Disconnect transfer device and go back to stage 1
19. Once audio and picture are on transfer preview page, click – record, then sit back and chill.
20. If dropped frames appear, stop recording, click – Configuration - reduce quality from 75%(73% very successful)(if dropped frames occur again follow this process again until zero or under 10 drops appear. If drops continue to be over 10 then go to Configuration and change format to 16:9. I've found that using 16:9 does not drop frames, so why not use it at the start of the process? Capturing at 16:9 streamlines your film, but when burning it at 4:3 the picture is enlarged and pixel blotches appear, burning it at 16:9 seems to try and condense an already condensed film and produces the same effect as 4:3. Both burns are viewable if you don't mind the slight grainier effect) P.S. Having '0' dropped frames is no guarantee that your video capture will be fully synchronized with audio and picture see stages 30-40)
21. Reducing Quality under 19% causes a very grainy, blotchy effect on recording(not worth doing). If dropped frames continue follow stages 30-40
22. Once your recording is complete - Click - OK button on transfer preview page(this will take you to the timeline page)
23. Click the Edit button
24. The recording will be logged as a DIP file. Click Save button immediately.(at this stage I would close the program and log back in to allow it to register the 'save' fully).
25. It is crucial that you check the playback on the Edit page once logged back in after saving.
26. If you have been lucky enough and your video and audio are in sync, it is crucial that you export your recording to your video files. Click -file, click – export – Select 4:3 or16:9 format, select Progressive for VHS to DVD. If you aren't too concerned about quality, choose avi, for MPEGs you will need to obtain an activation code – a prompt will appear if you are wanting to use MPEGs
27. Once export type is selected, the 'Mix down' info bar will appear on the bottom of the screen in the form of a yellow line which will travel all the way to the end of the screen upon completion(usually takes double the time of the original capture video e.g. 1hr 15min video captured my Magix, exporting time 2hrs 30mins)
29. Once exported successfully you will now have digitised your recording, hence making it easier to burn to disc.
30. At this stage it is crucial that you open the exported recording and check syncs are ok.If yes you can proceed to use the magix burn facility. If syncs have jumped out of line, open saved Dip project and follow stage 31-40
31. If audio and video out of sync on magix
33. Click – Edit tab
34. Select your new digitised video and drag it to the timeline (if it isn't there already)
35. If you have recorded a large section of film (15mins plus), cut into smaller manageable sections - Click – top section of film to show (S)(Starting point for playback and cutting)
36. Press (T), this will split the film so you can complete action in Stages 20 & 28
37. Once you have sectioned your film you can then start to sync audio and video within the selected sectiions. Place cursor over section you want to sync, you will have to wait until the cursor turns into a hooked hand type cursor
38. Once mouse over required section, Right click your mouse
39. Select setting 'Audio and Video settings', the audio frames setting interface now appears in the middle of the screen
40. Test out the settings. I've found that if the audio is faster than the video image, the left buttons slow them down to sync with video image and for speeding up audio I use the right buttons to sync with the video image
41. Once sync completed follow stages 25-29
42. Once vhs transferred to dvd successfully, insert dvd into dvd player, get yourself a cup of tea and a slice of cake then kick back and enjoy the show.
43. If you are planning to do multi VHS to DVD transfers please see guidance below; Read more about it here : http://www.superdub.com.au/vhs-to-dvd
44. On successful completion of the burn to disc and review process it is important to note – Save space on computer for optimum performance
45. Delete Magix projects created and empty from recycling bin
46. Save exported file to external mass storage
47. If need be, make duplicate copies of export and DVD
48. Delete any associated files created during process of DVD creation and empty from recycling bin.
------------------------
Super-dub.blogspot.com suggestion : If you want to review any other source like http://www.superdub.com.au/services/video-tape-transfer/ to get services regarding Vhs to DVD, Video to DVD, Video Transfer, Vhs DVD, Tape to DVD, Vhs Conversion. This would be great for you.
2. Open magix
3. Select New Project. Name new project.
4. Connect transfer device
5. Click – Record
6. Click – VHS tape
7. The transfer preview page pops up
8. Keep top two entries
9. Change folder for saving recording
10. Name recording
3. Select New Project. Name new project.
4. Connect transfer device
5. Click – Record
6. Click – VHS tape
7. The transfer preview page pops up
8. Keep top two entries
9. Change folder for saving recording
10. Name recording
11. Select the identical equipment to your media player i.e. vhs to vhs, dvd to dvd etc
12. If wanting to listen and watch your preview, make sure audio and video checked
13. If you don't want to sit around waiting for the recording to finish select and check timer(left click and drag mouse over number one, then insert time period
14. Take a moment to check process from 1-12
15. If VHS to VHS setting - Click configuration and set TV format ratio to 4:3(if not already set), If CD to CD – set TV format to 16:9, keep Quality at 73-75%(you can try quality at 100%, I have found that dropped frames occur after approx 45-60 mins of recording, I then had to follow stages 30 to 46 and the quality was sharper. If you have the time to sit and stop the video player each time frames dropped then replay and record then the 100% quality marking is well worth it).
16. Press play button on video player to check VHS tape is at desired place (Picture should appear in 'Preview Screen')
17. Audio bar should show decibel levels in two orange lines which fluctuate in length
18. *Important:See No 1* No audio or picture(sometimes if you connect transfer device before stage 1, magix may not log it and sound/video may not appear). Disconnect transfer device and go back to stage 1
19. Once audio and picture are on transfer preview page, click – record, then sit back and chill.
20. If dropped frames appear, stop recording, click – Configuration - reduce quality from 75%(73% very successful)(if dropped frames occur again follow this process again until zero or under 10 drops appear. If drops continue to be over 10 then go to Configuration and change format to 16:9. I've found that using 16:9 does not drop frames, so why not use it at the start of the process? Capturing at 16:9 streamlines your film, but when burning it at 4:3 the picture is enlarged and pixel blotches appear, burning it at 16:9 seems to try and condense an already condensed film and produces the same effect as 4:3. Both burns are viewable if you don't mind the slight grainier effect) P.S. Having '0' dropped frames is no guarantee that your video capture will be fully synchronized with audio and picture see stages 30-40)
21. Reducing Quality under 19% causes a very grainy, blotchy effect on recording(not worth doing). If dropped frames continue follow stages 30-40
22. Once your recording is complete - Click - OK button on transfer preview page(this will take you to the timeline page)
23. Click the Edit button
24. The recording will be logged as a DIP file. Click Save button immediately.(at this stage I would close the program and log back in to allow it to register the 'save' fully).
25. It is crucial that you check the playback on the Edit page once logged back in after saving.
26. If you have been lucky enough and your video and audio are in sync, it is crucial that you export your recording to your video files. Click -file, click – export – Select 4:3 or16:9 format, select Progressive for VHS to DVD. If you aren't too concerned about quality, choose avi, for MPEGs you will need to obtain an activation code – a prompt will appear if you are wanting to use MPEGs
27. Once export type is selected, the 'Mix down' info bar will appear on the bottom of the screen in the form of a yellow line which will travel all the way to the end of the screen upon completion(usually takes double the time of the original capture video e.g. 1hr 15min video captured my Magix, exporting time 2hrs 30mins)
29. Once exported successfully you will now have digitised your recording, hence making it easier to burn to disc.
30. At this stage it is crucial that you open the exported recording and check syncs are ok.If yes you can proceed to use the magix burn facility. If syncs have jumped out of line, open saved Dip project and follow stage 31-40
31. If audio and video out of sync on magix
33. Click – Edit tab
34. Select your new digitised video and drag it to the timeline (if it isn't there already)
35. If you have recorded a large section of film (15mins plus), cut into smaller manageable sections - Click – top section of film to show (S)(Starting point for playback and cutting)
36. Press (T), this will split the film so you can complete action in Stages 20 & 28
37. Once you have sectioned your film you can then start to sync audio and video within the selected sectiions. Place cursor over section you want to sync, you will have to wait until the cursor turns into a hooked hand type cursor
38. Once mouse over required section, Right click your mouse
39. Select setting 'Audio and Video settings', the audio frames setting interface now appears in the middle of the screen
40. Test out the settings. I've found that if the audio is faster than the video image, the left buttons slow them down to sync with video image and for speeding up audio I use the right buttons to sync with the video image
41. Once sync completed follow stages 25-29
42. Once vhs transferred to dvd successfully, insert dvd into dvd player, get yourself a cup of tea and a slice of cake then kick back and enjoy the show.
43. If you are planning to do multi VHS to DVD transfers please see guidance below; Read more about it here : http://www.superdub.com.au/vhs-to-dvd
44. On successful completion of the burn to disc and review process it is important to note – Save space on computer for optimum performance
45. Delete Magix projects created and empty from recycling bin
46. Save exported file to external mass storage
47. If need be, make duplicate copies of export and DVD
48. Delete any associated files created during process of DVD creation and empty from recycling bin.
------------------------
Super-dub.blogspot.com suggestion : If you want to review any other source like http://www.superdub.com.au/services/video-tape-transfer/ to get services regarding Vhs to DVD, Video to DVD, Video Transfer, Vhs DVD, Tape to DVD, Vhs Conversion. This would be great for you.
No comments:
Post a Comment